Tuesday, March 19, 2013

Whole Wheat Yogurt Bread

"The smell of good bread baking, like the sound of lightly flowing water, is indescribable in its evocation of innocence and delight."
~M.F.K. Fisher


I love making bread. 

Have I said that before?

I'm certain I have. But this is something that needs regular reiteration. 

I bake a lot of bread. I have ever since I was just a wee little baker and would watch Jukies (that's Julia Carolyn Child to you!) make bread on the black and white television in the living room and try to replicate it in mom's kitchen. (I had an incredibly patient family that would eat - or pretend to eat - pretty much anything I created in the kitchen.) I have a love affair with the tactile and olfactory qualities of making bread. But honestly, I won't belabour that here because I have already done so here, here, here, and here.

One of the joys of baking for a long time is being able to bake not from a book or some established recipe, but rather from a synthesis of experience, from the knowledge of what will give you a particular flavour, texture, quality of crust, or colour and creating something that is delightful.

This recipe is certainly no one-of-a-kind wonder. You can most surely find similar recipes in a thousand online posts. But it is mine, combining my favourite qualities of texture and flavour. The whole wheat flour gives it a special texture and colour. The white flour lets the bread rise higher than a 100% whole wheat bread and produces a lighter loaf. The honey give it a kiss of sweetness while the yogurt gives it a touch of tart almost reminiscent of a light sourdough.

And at home it is a favourite.

I hope you enjoy it, both in the making and the eating!

Whole Wheat Yogurt Bread
3/4 cup warm water
2¼ tsp active dry yeast
2 cups whole wheat flour, finely milled
4 cups white flour
2 tsp salt
2/3 cup plain yogurt
1 1/3 cup hot water
4 Tbs oil
3 Tbs honey

Dissolve the yeast in the 3/4 cup of warm (105º to 115º F) water in a warmed glass or ceramic container. Make certain the yeast is completely dissolved and there are no clumps. Let it sit while you prepare the other ingredients.

In a large mixing bowl, combine the dry ingredients and mix, fluffing them with air.

In a small bowl, combine the yogurt and hot (about 130º F) water. Add the oil and honey. Mix well.

Make a well in the center of the dry ingredients and pour in the dissolved yeast and the wet ingredients. Stir from the center of the well gradually outward until you have a thick batter-like consistency. Start folding in flour from the sides and mix until all the flour is combined. The dough will be a little sticky.

Turn out the dough onto a very lightly floured surface and knead for about 20 minutes. That may sound like a lot, but remember that kneading is the difference between good bread and spectacular bread.

How do you know when bread is sufficiently kneaded? The dough will lose its tackiness and become smooth and springy. You want the dough to be silky smooth. As it is almost impossible to over-knead bread, it is better to knead too much than not enough.

Form the dough into a smooth round and place it seam down in a bowl. Lightly cover it with plastic wrap or a damp towel (making certain the bowl is large enough to allow for a doubling or tripling of the dough as it rises without it hitting the cover) and let it rise in a warm place (ideally 80º F) for about an hour and half.

When the first rising is complete, gently place your fist into the center of the dough and press down, deflating it. Gentle peel away the dough from the sides of the bowl and fold it under itself all around the edge until you have a round ball again. Cover the bowl and let it rise again, this time about 45 minutes.

Once again you want to deflate and re-round the dough. Let it rest for a few minutes.

Divide the dough in two and shape each piece into a loaf. Place the loaves in buttered loaf pans and let them proof (the third rising) for about half an hour. You'll want to keep a close eye on this third rising because it can easily get away from you and over rise. About half-way through the proof you want to adjust your oven racks so the loaves will be as nearly in the middle of the oven as possible and start preheating the oven to 350º F so it will be hot when the loaves are ready.

When the loaves have risen and the oven is hot, place the loaves as close to the center of the oven as possible. Bake at 350º F for one hour. The crust should be a rich, deep golden brown when it is done.


And finally, ENJOY!

Thursday, November 29, 2012

Red Wine Pot Roast

"Nothing is more memorable than a smell. One scent can be unexpected, momentary and fleeting, yet conjure up a childhood summer beside a lake in the mountains; another, a moonlit beach; a third, a family dinner of pot roast and sweet potatoes during a myrtle-mad August in a Midwestern town. Smells detonate softly in our memory like poignant land mines hidden under the weedy mass of years. Hit a tripwire of smell and memories explode all at once. A complex vision leaps out of the undergrowth."
~Diane Ackerman, A Natural History of the Senses
 

We are shut away as the weather turns cold, our doors and windows fast against the chill, closing out the world around us we so enjoy when the weather is more pleasant. Yet it is not without advantage. Closing homes against Jack Frost means also that they fill with the sights, sounds, and smells of domesticity to greet us when we escape from the bitter weather. There is nothing quite as comforting as coming home to warmth and the smells of cooking.

One of my favorite cold-weather dishes is pot roast. It is simple and straightforward. Hearty. And you cook this one with wine.

The smell of this cooking is certain to raise spirits and increase appetites. 

Red Wine Pot Roast
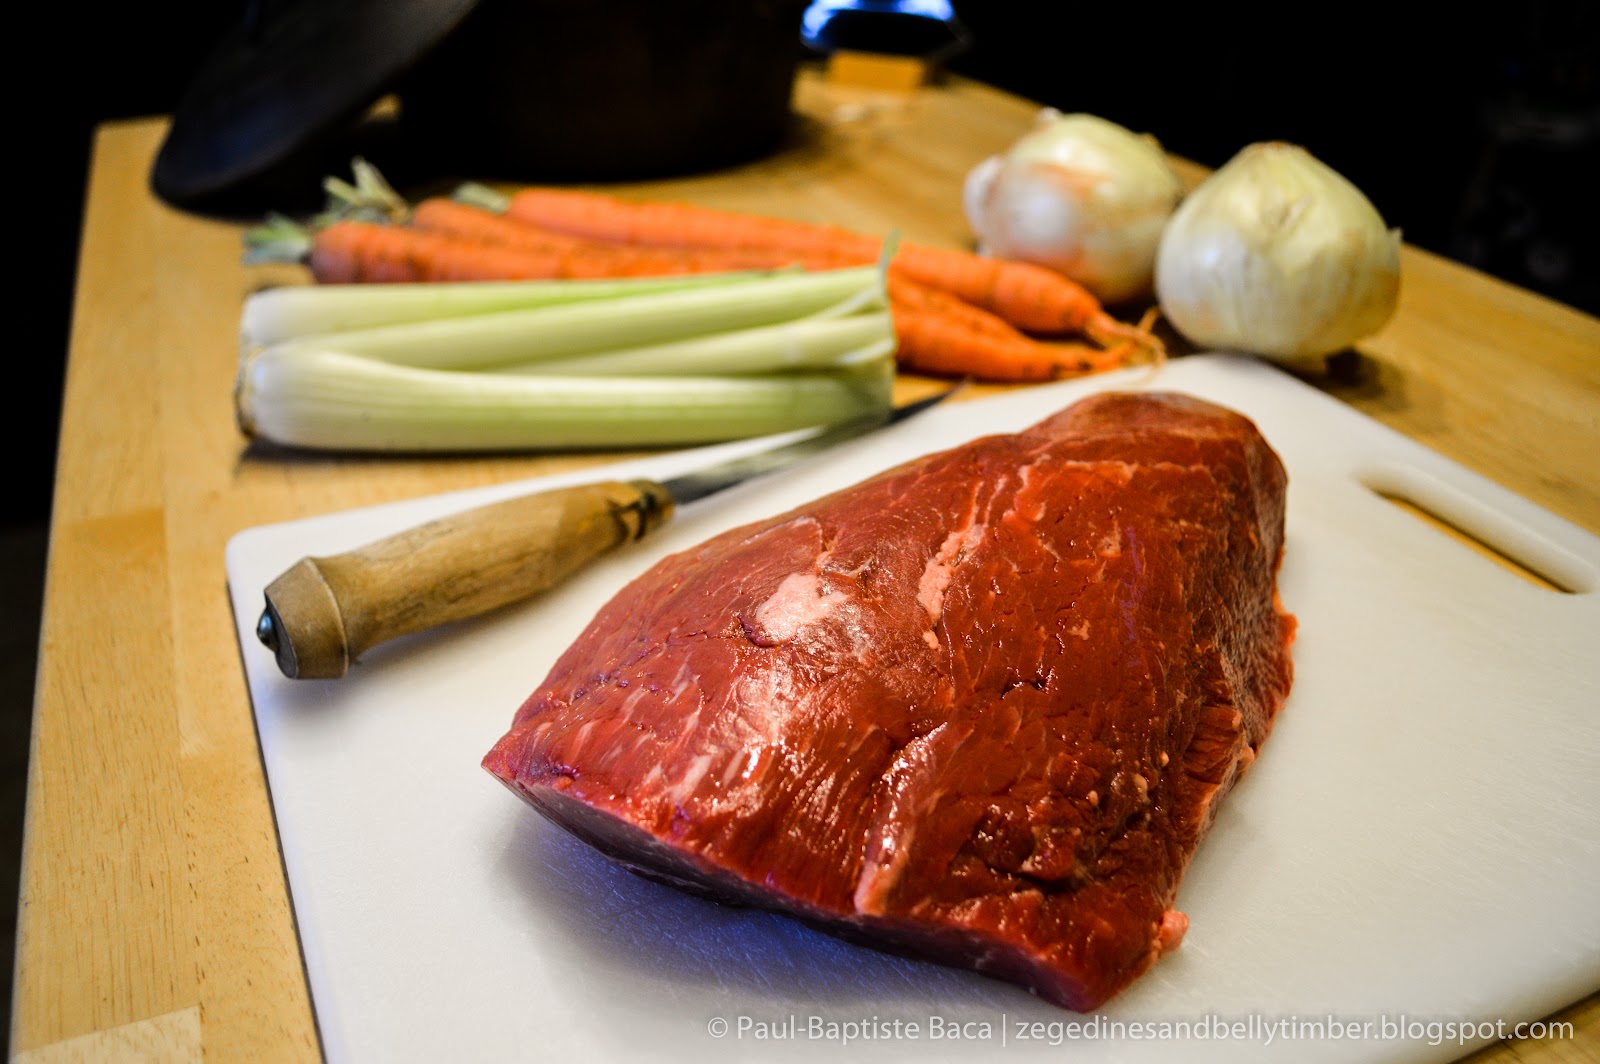
3 pounds boneless beef chuck roast
2 Tbs olive oil
½ cup water
½ cup red wine
1 tsp whole pepper corns
2 tsp salt
1 bulb of garlic, each clove peeled and sliced lengthwise
1 onion, sliced
6 medium potatoes, washed and cut into 2-inch pieces
3 large carrots, peeled, halved, and cut into 2-inch lengths
6 celery stalks, cut into 2-inch lengths


Preheat an oven to 350º F.

Heat the olive oil over medium-high heat in an oven-proof Dutch oven with a tight-fitting lid. Brown the roast on all sides and remove from the heat.

With a sharp, thin knife - I use a fillet knife - make small cuts on the surface of the roast and insert the garlic cloves.


Pour in the water and wine. Sprinkle the roast with the salt and pepper corns. Arrange the onion slices on and around the roast.

Cover the Dutch oven and bake in the preheated oven for 2 hours.

While the roast is cooking  prepare the potatoes, carrots, and celery.


After 2 hours, add the potatoes, carrots, and celery. Check the moisture of the roast and add some additional water if it looks dry. Continue baking covered for another hour.


The roast is best served au jus, which just means you use the remaining liquid from the Dutch oven as a kind of light gravy over the meat. If the liquid is sparse after removing the meat, just add a little more red wine and heat it in the Dutch oven over a medium heat.


Enjoy!

Monday, November 12, 2012

Baked Pumpkin Buttermilk Doughnuts

"Don't miss the doughnut by looking through the hole."
~ Anonymous


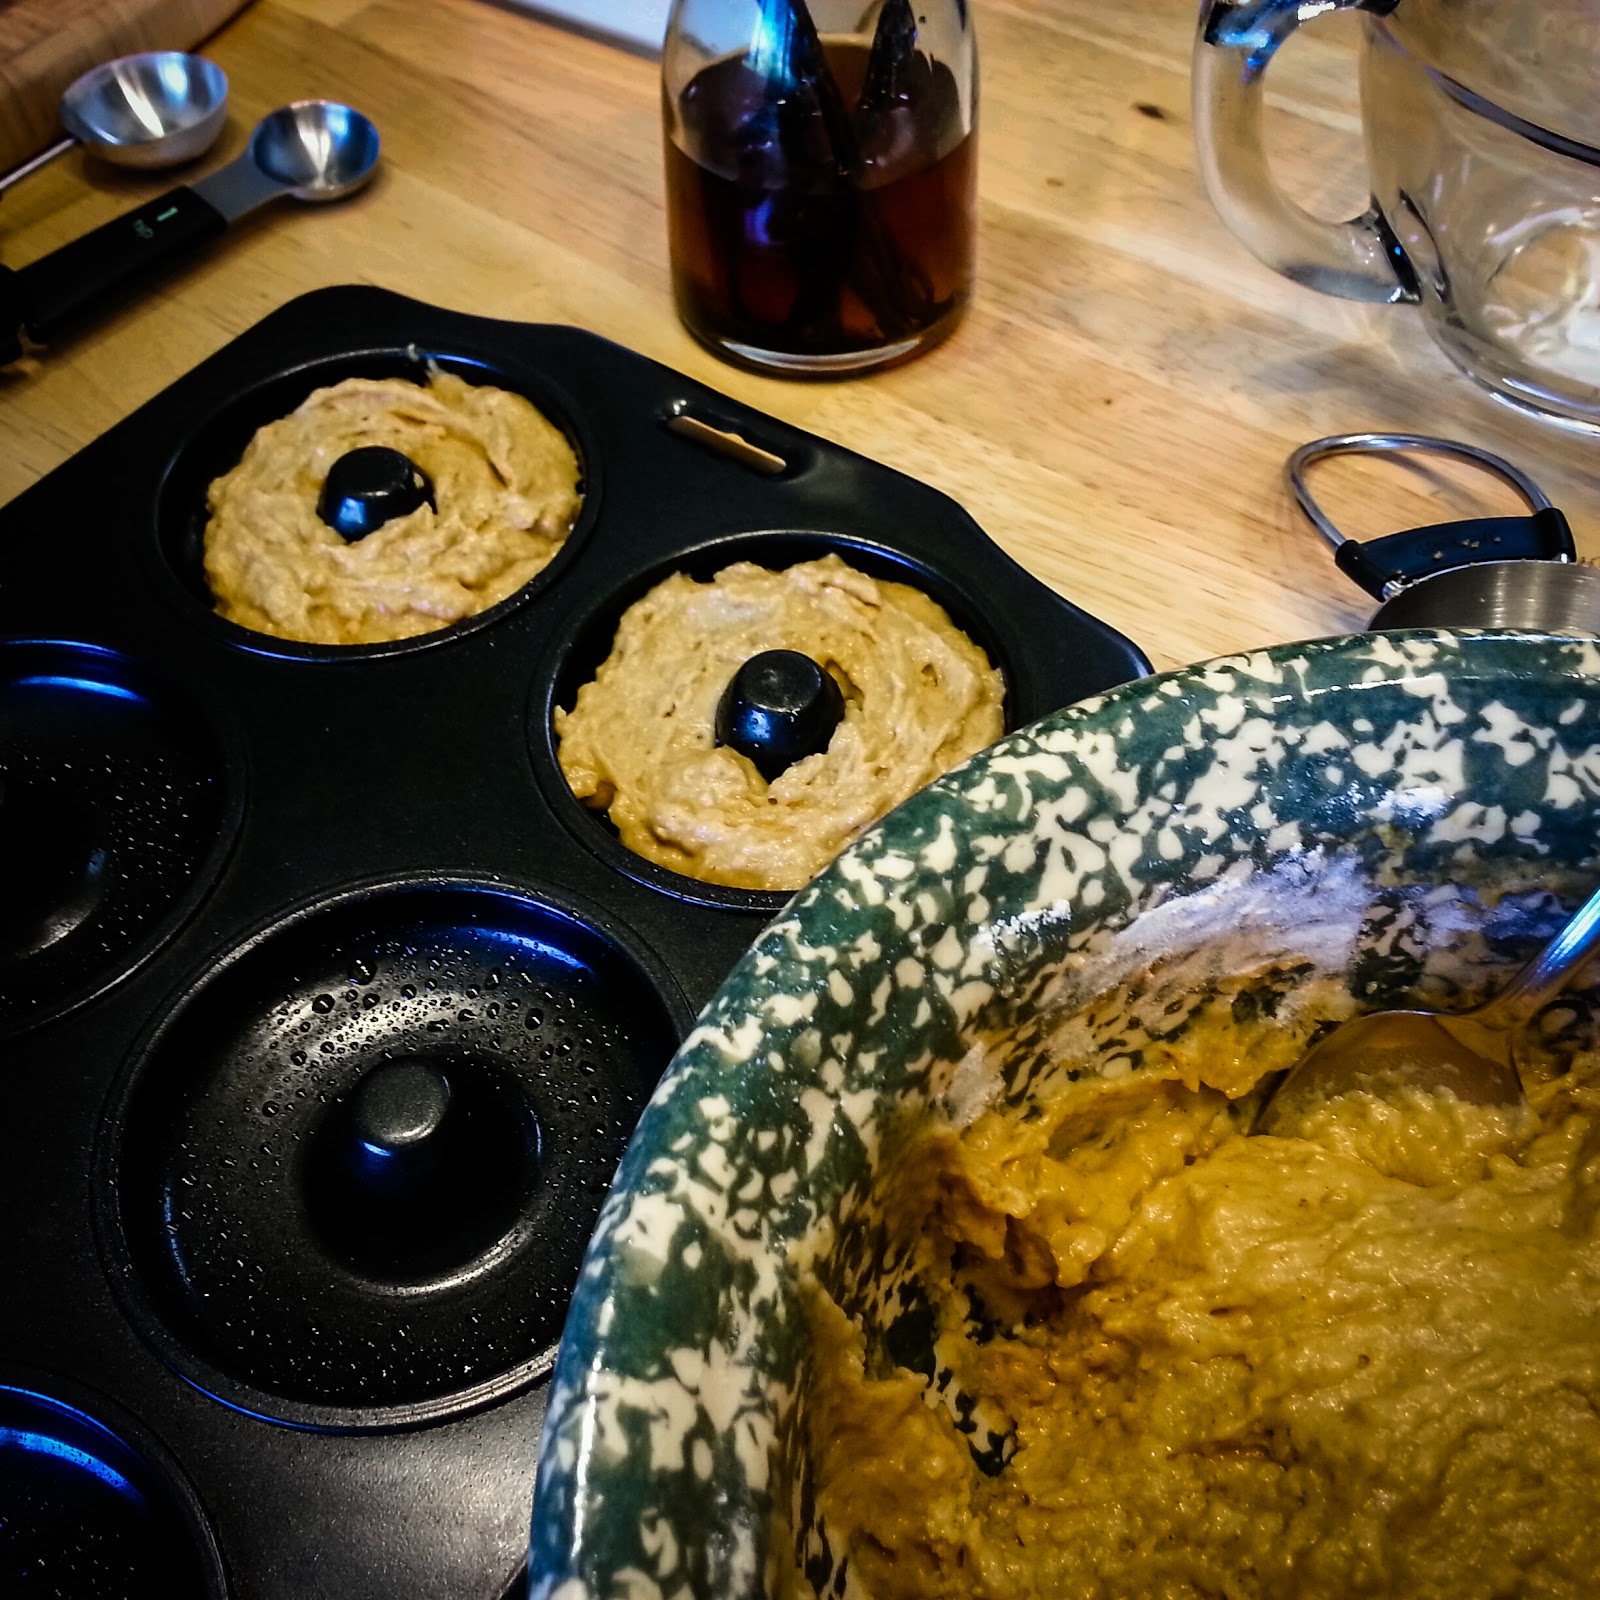
Let's get this out of the way right now. This is a post about toroidal ring doughnuts (Bet you didn't know that's the technical term for the common hole-in-the-middle doughnut, did you? Neither did I.) and not filled doughnuts. And these toroidal ring doughnuts are baked, not fried. So you'll need a doughnut pan to make them.

According to sources (read: the Internet) the pedigree of doughnuts is hotly disputed. Doughnuts were either invented by Dutch settlers in the 19th century - who also gave us cookies and apple pie and, one assumes, the infamous red velvet fudge cake served at the Waldorf Astoria Hotel, the $250 cookies from Mrs. Fields circa 1980, and perhaps the the similarly priced Neiman Marcus chocolate cookies that your mother's sister's best friend was duped into buying by a pleasantly smiling waitress in 1994 - or by an American sailor by the name of Hanson Gregory in 1847 who, being a know-it-all 16-year old, felt that his mother's cooking was too greasy and never quite done enough in the middle and so took it upon himself to better her olykoeks.

Gregory was of Dutch stock so the Dutch still get a certain fame regardless of which version you choose to believe. 

Interestingly enough, doughnuts first get a mention in culinary literature in 1803 in an English Volume which included doughnuts in an appendix of American recipes. As this was a good 44 years before Hanson claimed to have bettered his mother's under-cooked olykoeks and 28 years before he was even born, one has to wonder if the American sailor was just full of it.

However they came to be, doughnuts were and are a popular treat. And as fall freezes into winter anything I can add pumpkin to is welcome. These doughnuts are wonderfully light and rich and the buttermilk and pumpkin give them a real feel of fall.

Baked Pumpkin Buttermilk Donuts
1 3/4 cup flour
1/2 tsp baking soda
1/2 tsp salt
1 tsp pumpkin pie spice
1/3 cup olive oil
1/2 cup buttermilk
1/2 cup packed brown sugar
1 egg
3/4 cup pumpkin puree
1 tsp vanilla

Sugar Coating
1 cup granulated sugar
1/2 Tbs cinnamon
8 Tbs butter, melted

Preheat the oven to 350° F.

Combine all the dry ingredients except the brown sugar in a medium bowl. Mix well.


In another bowl, combine all of the wet ingredients plus the brown sugar. Whisk together until smooth.


Slowly add the dry ingredients into the wet using a spoon. You do not want to over-mix.


Spoon the batter into a greased doughnut pan, filling just shy of the top as the doughnuts will rise quite a bit.


Bake for 10 to 12 minutes or until a toothpick inserted into the thick portion of the doughnut comes out clean.


Remove the doughnuts from the pan and let them cool on a cooling rack while you prepare the sugar coating.


Melt the butter completely. Pour the butter into a small, flat-bottomed bowl or dish. In another flat-bottomed bowl, mix together the granulated sugar and cinnamon.


Take a doughnut and dip it face-down into the melted butter. You want to coat the top and sides with butter. Immediately put it in the sugar coating mixture, making certain you get all the butter covered with the sugar.


Put the doughnut back on the cooling rack, face-up, and repeat with the remaining doughnuts.

Best enjoyed warm!


Makes about 10 standard sized doughnuts.

Wednesday, September 5, 2012

Cinnamon Roll Apple Pie

"The natural term of an apple-pie is but twelve hours. It reaches its highest state about one hour after it comes from the oven, and just before its natural heat has quite departed. But every hour afterward is a declension. And after it is one day old, it is thence-forward but the ghastly corpse of apple-pie."
~Henry Ward Beecher

We had guests coming over for dinner. The dinner part was easy, pork ribs. Lots of them. Smothered in a spicy sauce. But I also wanted to make a dessert. I have this nostalgic feeling about summer fare and apple pie, even though I don't particularly like apple pie. But I figured the pie would go well with the ribs. So I bought apples. Gorgeous, golden-green apples.

And then the doubt set in.

Should I really make something I don't like?

Maybe not.

I like cinnamon rolls. A lot. One of my favourite desserts. 

I decided I would make cinnamon rolls.

And again, the doubt set in.

Is it lame to make a dessert like cinnamon rolls - a very breakfast-esque pastry - to follow up a hearty meal like ribs?

Maybe.

So what to do..?

The thing I do not like about apple pie, and pies in general, is the crust. I am just not a fan of pie crust. I feel that the best pie crust, as flaky and tender as can be imagined, is still too...something. It is not a something I can readily put my finger on. But I don't enjoy it. I usually end up eating the filling and leaving behind a hollow shell. Like the corpse of a Tauntaun. Yes, I think it is that gross.

I do love cinnamon rolls though. So...why not do the You-Got-Your-Apple-Pie-In-My-Cinnamon-Rolls thing? No reason not to try.

I was uncertain what the outcome would be with this. I'm certain someone somewhere has done this before, but I like my kitchen experiments to be mine and so did not go searching for already-done recipes. I just combined my cinnamon roll recipe and my apple pie recipe and crossed my fingers. I think it turned out fabulous.

Cinnamon Rolls
2 to 2 1/4 cups flour
1 1/8 tsp active dry yeast
1/2 cup milk
1/8 cup sugar
1/8 cup butter
1/2 tsp salt
1 egg
3 Tbsp butter, softened
1/4 cup brown sugar, firmly packed
1 tsp ground cinnamon

In a large bowl combine 3/4 cup of the flour and the yeast. Heat the milk, granulated sugar, the 1/8 cup butter and salt just until mixture is warm (about 120º to 130º degrees) and the butter is almost melted, stirring constantly.

Add the milk mixture to the flour mixture. Add the egg. Beat with an electric mixer on low for 30 seconds, scraping the sides of bowl. Beat on high for another 3 minutes. Using a spoon, stir in as much of the remaining flour as you can to make a very soft dough.

Turn the dough out onto a lightly floured surface and knead in enough of the remaining flour to make a moderately soft dough (3 to 5 minutes total). Shape the dough into a ball.

Place dough in a lightly greased bowl. Cover and let rise in a warm place until double (about 1 to 1 1/2 hours).

Punch the dough down and shape into a smooth ball. Cover and let rest for 10 minutes.

Roll the dough into a rectangle 12-inches by 8-inches. 


Spread with 3 Tbsp softened butter. Combine the brown sugar and the cinnamon and sprinkle it over the rectangle.


Roll the rectangle up from a short side. Seal the long edge.

Start slicing the dough roll into 1/2-inch pieces. As you cut each slice, place it in the greased pie pan, squashing the roll flat, arranging them first along the edges and then to fill in at the bottom of the pan.


You want to make certain you leave enough of the roll to make a top for the pie as well.

Preheat oven to 425°F.

Apple Filling
1/2 cup sugar
1/4 cup flour
1/2 tsp ground cinnamon
1/2 tsp ground nutmeg
1/8 tsp salt
8 cups sliced, cored and peeled tart apples (8 medium)
2 Tbsp butter


In large bowl, mix sugar, flour, cinnamon, nutmeg and salt. Stir in apples until well mixed.

Spoon into the cinnamon roll-lined pie pan. Cut the butter into small pieces and sprinkle over filling.

Take the remaining cinnamon roll roll and continue slicing it into 1/2-inch thick slices. Squash the slices flat and start forming the crust on top of the apple filling, placing them close together to form a solid shell.


(The pie bird is not necessary, but if you've got one, by all means use it; they are beautiful and will vent steam from the filling lowering the chance of filling boil-over.)

Cover the pie with foil to prevent excessive browning. Bake 40 to 50 minutes or until crust is brown, removing foil for last 15 minutes of baking. 


Serve warm.


And enjoy!

And in case you were curious, the pie was a hit at dinner. The guests loved it.

Sunday, June 10, 2012

Chocolate Chip Cookie Dough Cupcakes

"There's nothing a cupcake and coffee can't solve."
~Marie Williams Johnstone

"I absolutely love making chocolate chip cookies. I mean, it's fun. It's exciting. Beyond the fact that I love making them, I love eating them."
~ Debbi Fields

I would like to take a moment to thank two very important women in the history of civilization:  Eliza Leslie and Ruth Graves Wakefield.

Not familiar with these two enlightened souls? For shame!

The earliest documentation of the term "cupcake" can be found in Eliza Leslie's seminal work, Seventy-five Receipts for Pastry, Cakes, and Sweetmeats, published in 1828. Yes, cupcakes were around before that, possibly as early as the late 1700s, but Ms. Leslie chronicled the sobriquet we know and love.

Ruth Graves Wakefield owned the Toll House Inn, in Whitman, Massachusetts. Toll House. Yes, that's ringing a bell in your head, isn't it? Ms. Wakefield's very popular restaurant featured home cooking and her cookbook, Toll House Tried and True Recipes, published in 1936, included the recipe for "Toll House Chocolate Crunch Cookie". The first chocolate chip cookie recipe.

Without these two women the world would be bereft of cupcakes and chocolate chip cookies.

Take a moment to think about that. And to thank them.

Of course, anyone who has made chocolate chip cookies has eaten the cookie dough. And this is a bit of heaven, dropped by large spoonfuls, in itself. Perhaps all the more so because we are so often admonished today with warnings of avoiding eating anything containing raw eggs. But eat the raw dough we do. And we love it. 

Cupcakes.

Chocolate chip cookie dough.

Who it was that first decided to combine these two pieces of bliss I do not know. But that person, inspired by divine insight or blessed with the clumsy luck that also gave us Reeses Peanut Butter Cups, also holds a special place in my heart.

Enough rambling. On to the recipe.

The cupcake is a basic chocolate cupcake that is so ridiculously simple to make (you mix in a blender) that it is almost unbelievable how good it is. The eggless cookie dough is completely safe to eat. The frosting, the pièce de résistance, is simply amazing. It tastes just like cookie dough.


Chocolate Chip Cookie Dough Cupcakes
Cookie Dough Filling:
(This is an egg-free recipe and therefore safe to consume raw!)
3/4 cup all-purpose flour
1/8 tsp baking soda
1/8 tsp salt
4 Tbs (1/2 stick) butter
1/4 cup packed brown sugar
2 Tbs white sugar
2 Tbs milk
1 tsp vanilla extract
1/2 cup chocolate chips

In a small bowl, mix together the flour, baking soda and salt.


In a medium bowl, whisk together the butter, sugars, milk and vanilla. 


Stir in the dry ingredients.


Add the chocolate chips. 


Refrigerate this dough for about 20 minutes, or until firm. Scoop out dough in heaping tablespoon scoops and place it on a cookie sheet. You will want 12 balls of cookie dough.


Freeze until firm, at least 30 minutes. This helps keep the cookie from baking, and remain soft dough, when you bake the cupcakes.


Cupcakes:
1 cup all-purpose flour
1/2 cup unsweetened cocoa powder
1 cup granulated white sugar
1/2 tsp baking soda
1/4 tsp salt
3/4 cup hot water
1/2 cup oil (I use olive oil)
1 large egg
1 1/2 tsp vanilla extract

Preheat the oven to 375° F. Line a cupcake tin with 12 liners. 

Place the flour, cocoa, sugar, baking soda and salt in a blender. Blend to combine. 


Add the water, oil, egg and vanilla. Blend well, scraping down the sides as needed. 


Divide the batter evenly between the 12 cupcake liners. 


Drop a ball of frozen chocolate chip cookie dough into the center of each cupcake.


Bake the cupcakes 20 to 25 minutes, or until a toothpick inserted into the cupcake portion of the cupcake, and not through the center where the cookie dough is, comes out clean.


The balls of cookie dough have been hidden away by the rising of the cupcake batter!

Cool the cupcakes completely before adding the frosting.

Frosting:
3/4 cup (1 1/2 sticks) salted butter
1 3/4 cups powdered sugar
1/3 cup packed brown sugar
1/2 cup all-purpose flour
1 1/2 Tbs milk
1 tsp vanilla extract

In a medium bowl, combine the butter and sugars, mixing until smooth and creamy.


Mix in the flour, milk and vanilla and continue to mix until all is well combined.


When the cupcakes are cooled completely, it is time for assembly.

Frost the cupcakes with a knife or spatula. You want the frosting to resemble a dropped cookie, so avoid covering the cupcake completely or making it too smooth.


Sprinkle some chocolate chips on top and press them slightly into the frosting to complete the look of an uncooked chocolate chip cookie.


What you get are a dozen delicious chocolate cupcakes filled with chocolate chip cookie dough and topped with what looks and tastes like an uncooked chocolate chip cookie! Delicious!